WordPress is widely used CMS because of its easy process of installation, setup and data management. Now WordPress is more easy to customize and manage data because of flexible and user-friendly plugins and themes like Elementor, Divi, Astra theme etc. User can easily launch their website with less effort and knowledge of coding. I will try to help all the non-tech users who can follow these steps and publish their site online.
Prior Requirements
- PHP version 7.4 or greater.
- MySQL version 5.6 OR MariaDB version 10.1 or greater.
- Xampp Control Panel
Setup Process:
Step 1:
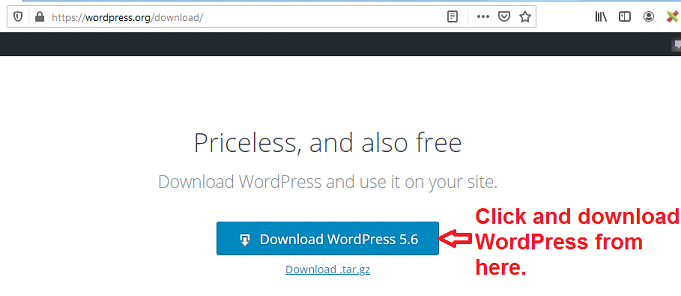
You need to download wordpress files from wordpress.org website. You can download WordPress from httpss://wordpress.org/download/ You can find download button on site like below:
Step 2:
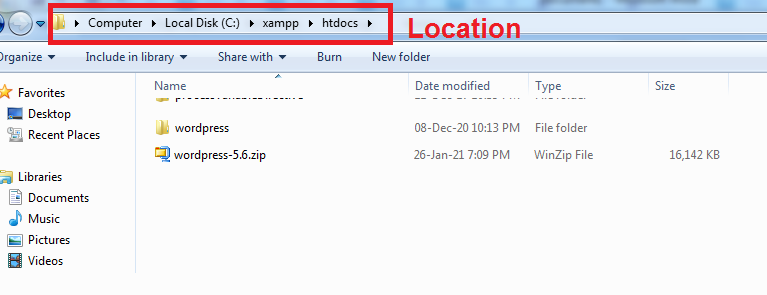
You will receive .ZIP file of WordPress files and packages. After downloading WordPress files, you need to place that .ZIP in C:\xampp\htdocs folder (If you are working on local machine).
If you are working on live server, you need to place .ZIP file in root directory. That is, under public_html/
Step 3:
Replace folder name with your project name. Let’s assume folder name as ‘myfirstproject’
Process to connect WordPress with Database
Step 4:
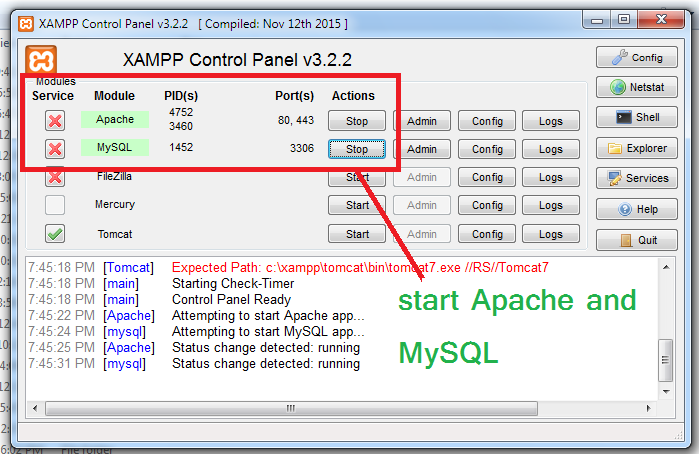
Now before moving ahead for the next step, you need to start local server (Apache) and MySQL option to start.
Step 5:
Now, run the command on web browser like https://localhost/[yourprojectname]. once you run this command you can see below screen. Here my path will be like https://localhost/myfirstproject

You can select your native language from here. Default language will be English.
Step 6:
Once you will click on continue, you need to create a database from where you need you need to get database name, database username, password and database host details.
NOTE: Remember, this information will be saved in wp-config.php file which can be found here: C:\xampp\htdocs\myfirstproject\wp-config.php and you can edit them according to your database information.

Steps to create Database: (Steps for local machine)
Step 7:
Open phpmyadmin in web browser https://localhost/phpmyadmin/
Now, to create new you need to click on new button. Please find initial screen from where you can create database.
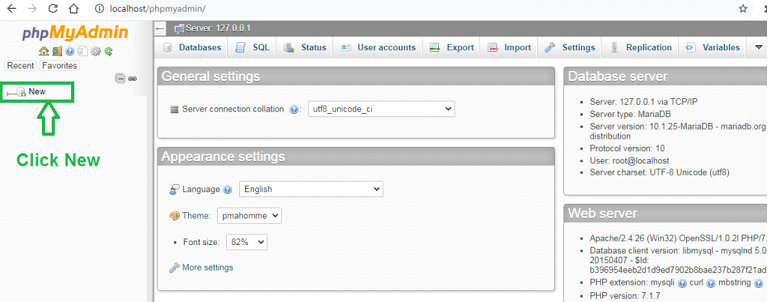
NOTE: Give proper database name that describes your project then click on ‘Create’. See below image.

Step: 8
After creating database, you need to fill the database information in wordpress like below:

NOTE: In local machine, default username is root, password should remain blank and Database Host should be localhost. See how to create and connect database on live server?
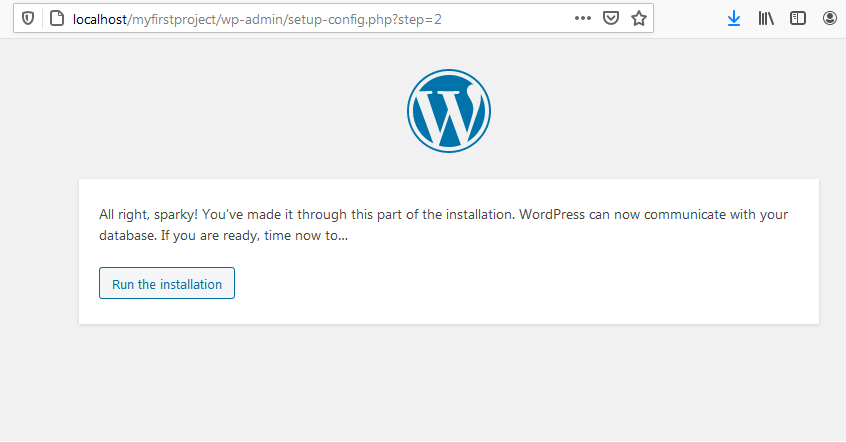
Once you can press run the installation button, your wordpress will connect with your database.
STEPS TO INSTALL WORDPRESS
Step:9
You need to provide following information:
- Site Title – that can be your domain name or business name.
- Username – You need to provide username for admin login. This username will be used to login your admin panel/dashboard.
- Password: Admin login password (Don’t forget to copy password in text file)
- EMail ID: Enter mail ID, in which you will get all update notification mails.

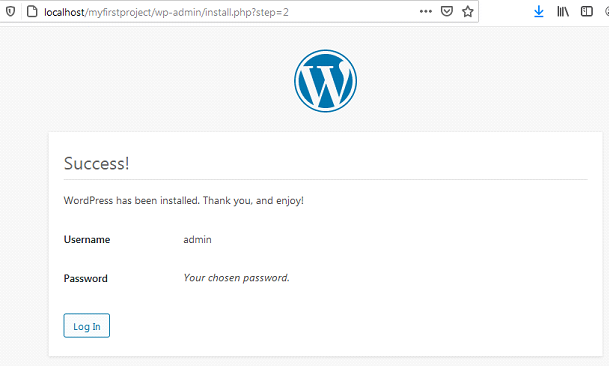
Step:10
Once you install WordPress, you will get success message like this and now you can login to your your admin dashboard to build/customize your website.

Ready to check your website now. URL should be like: https://localhost/myfirstproject/

Still Confused? Get Help!
WordPress is very easy to setup, install and to build a site and it is 100% FREE available. As per the latest statistics in 2021, 35% of the internet is powered by WordPress. It’s easily available by one download click. If you are still not getting output, you can contact Parinshi for detailed help.
Thank you everyone!